To use 2nd Sight devices and apps, users must add Tasks to the Web Portal account. NOTE: After adding Tasks, Lists and List Items, you MUST sync your device to the Web Portal for the new information to appear on the device.
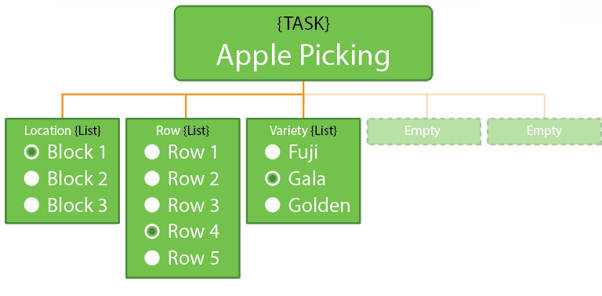
Task: In the Web Portal, a “Task” is a job that employers wish to track - a Task is based on an action. Task creation depends on employer processes. In the above graphic, “Apple Picking” is the Task. Employers can create unlimited Tasks on the Web Portal. Each Task is linked to one piece rate or payroll code. You can manage, add, and edit Tasks in your Web Portal account. Look for Manage --> Tasks on the navigation bar.
Add a Task
- Log in to your Web Portal account.
- Select Manage --> Tasks on the navigation bar.
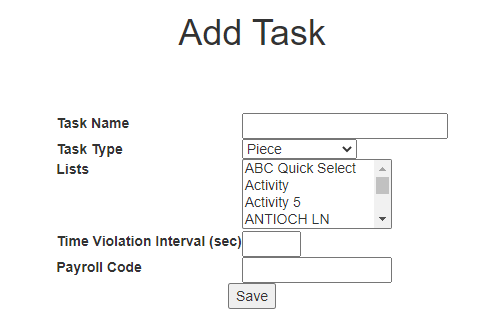
- On the Tasks screen, click "Add Task" (in green, center screen).
- Fill in the Task Name field. The name should be meaningful because you cannot delete or change a Task Name.
- Choose the Task Type. The Task Type determines the kind of data recorded and workflow. The following Task Types are available, depending on the 2nd Sight product(s) purchased.
- FairPick, FairPick Flex: Weigh, Nonproductive, PaidBreak, UnpaidBreak
- FairTrak: Container, Hourly, Piece, Nonproductive, PaidBreak, UnpaidBreak
- InstaCaliper, TallyTrak: InstaCaliper (aka “measurement”)
- MobileClock: Container, Hourly, Nonproductive, Piece, PaidBreak, UnpaidBreak
- QuickPick: Piece, Nonproductive, PaidBreak, UnpaidBreak
- StockTrak, TCTrak: Inventory
- Add an optional "Payroll Code."
- Click "Save" to return to the "Tasks" screen.
Lists are a subcategory of Task; they provide additional information about a Task. A List can be attached to more than one Task. Often, it is easier to create Lists before creating Tasks, as the Task setup will ask you to attach Lists to a Task. Some potential Lists might be “Location,” “Row,” and “Variety.” You can create as many Lists as you wish BUT you can only add up to five Lists per Task (four Lists per Task if using FairPick Flex). You manage, add, and edit Lists in your Web Portal account. Look for Manage --> Lists on the navigation bar.
Add a List
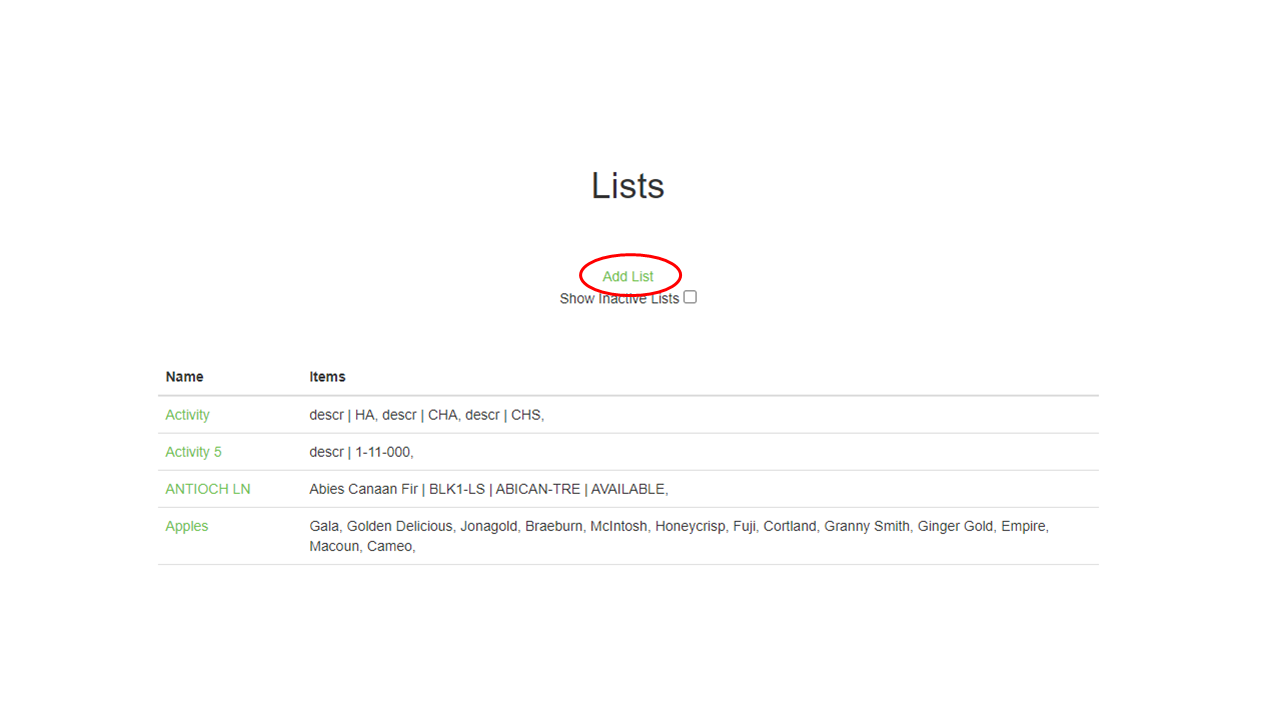
- In the Web Portal, select Manage --> Lists on the navigation bar.
- On the "Lists" screen, click "Add List" (in green, center screen).
- Fill in the List Name field. The name should be meaningful because you cannot delete and must not change a List Name. Changing a List Name will negatively affect entered data.
Assign Lists to a Task
- After you add Lists, you can assign them to any Task.
- Select Manage --> Tasks on the navigation bar.
- In the "Tasks" screen, choose the Task (in green) to which you want to attach one or more Lists.
- The "Edit Task" screen will appear. You will see "Lists" next to a box with various names in it.
- To select a List, hover your cursor over the name and click it. To select multiple Lists, press "Ctrl" on your keyboard, and click on multiple List names to highlight them.
- Click "Save" to return to the "Tasks" screen.
List Item: A subcategory of a List which allows the user to break List down further. In the above hierarchical graphic, under the List “Location,” the List Items are “Block 1,” “Block 2, and “Block 3.” Add as many List Items to a List as needed.
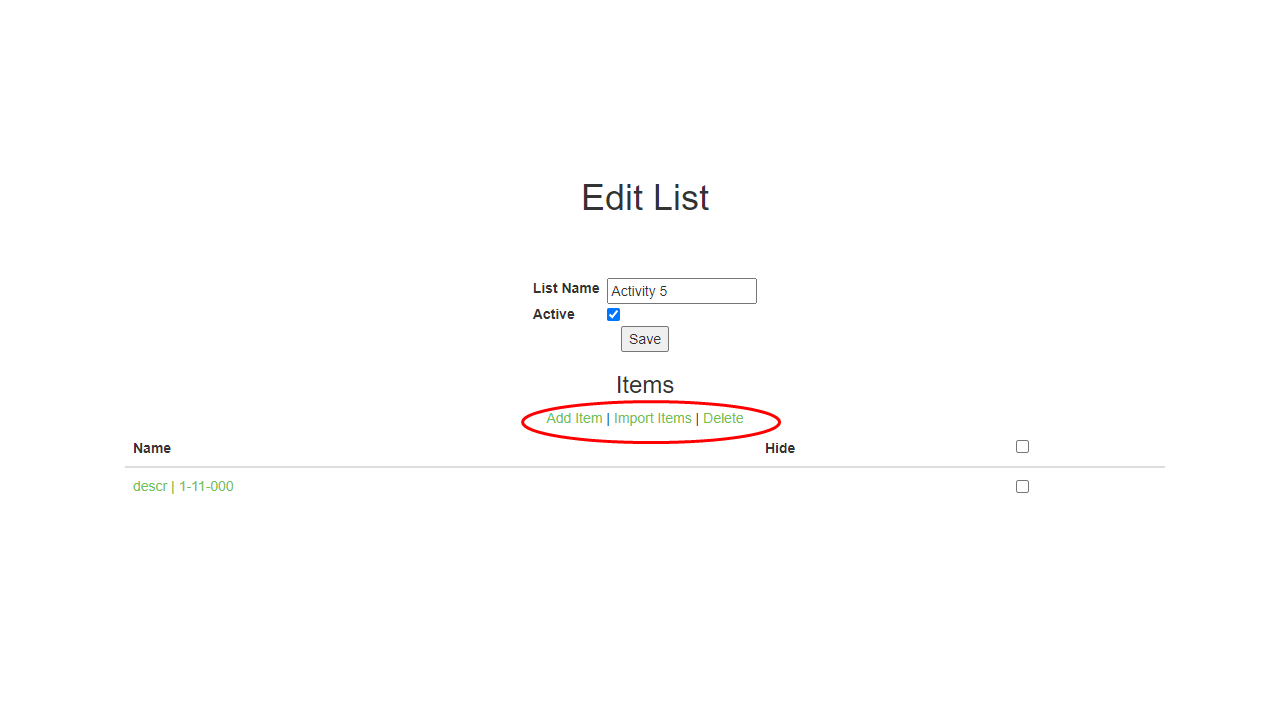
Add a List Item
- In the Web Portal, select Manage --> Lists on the navigation bar.
- On the "Lists" screen, click on a already created "List" (in green, in the above graphic, e.g. "Activity 5").
- Select "Add Item" (in green, center screen, under "Items").
- An "Add List Item" screen will appear. You can add one or more List Items at a time:
- Fill in the name field with a meaningful name and click "Save" to return to the "List" screen or "Save and add another" to add more List Items.
- Import a *.txt file that has multiple List Items by choosing "Import Items" (in green, center screen, under "Items). For the upload to be successful, there may only be one List Item per line in the *.txt file.
- Click "Import Items."
- Choose the *.txt file you wish to upload.
- Click "Upload." If successful, you will be taken back to the pertinent "Edit List" screen, and you will see the added List Items on the screen.
- Click "Save" to return to the "Lists" screen.